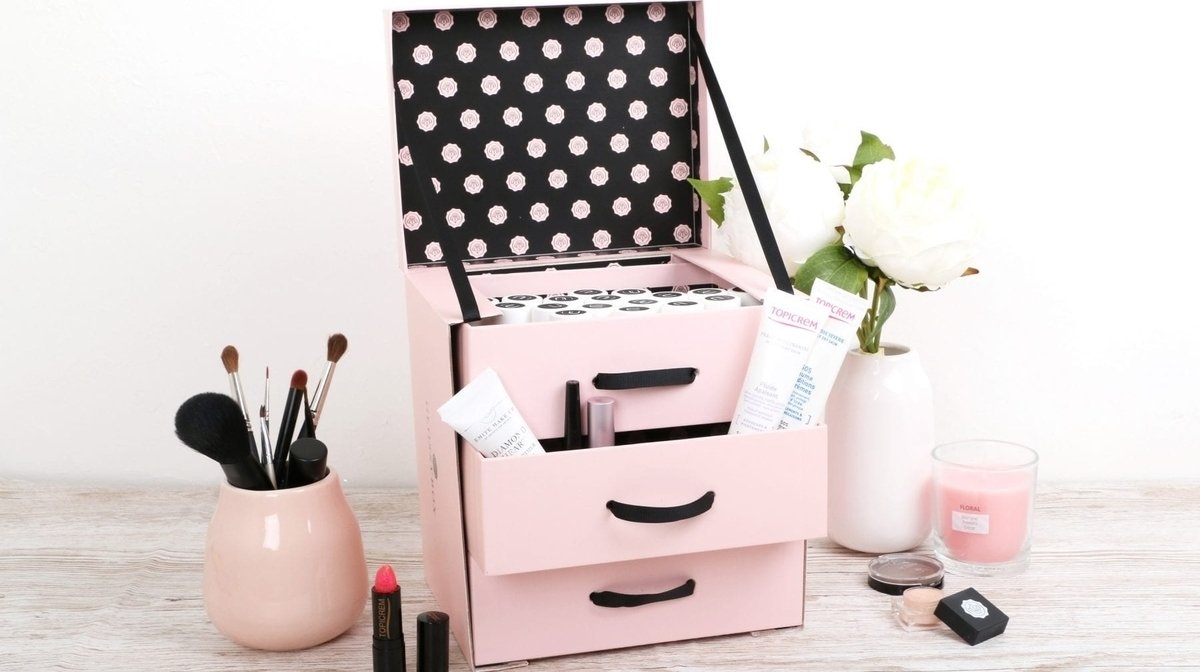

If you’ve been a GLOSSYBOX subscriber for a while now, you no doubt struggle to find enough storage space for all your beauty treats. So, we’ve put together a tutorial to show you how to upscale your boxes and turn them into a drawer unit so you can organise your cosmetics!
What You’ll Need
- 5 pink GLOSSYBOXes, empty
- A box cutter
- Strong glue
- A GLOSSYBOX ribbon
- Tape
How To Make A Drawer Unit
Of all the ways to upscale your GLOSSYBOX (and there are a lot!), this may take you a little more time. Don’t worry, it’s not difficult though, and it will be worth it in the end!
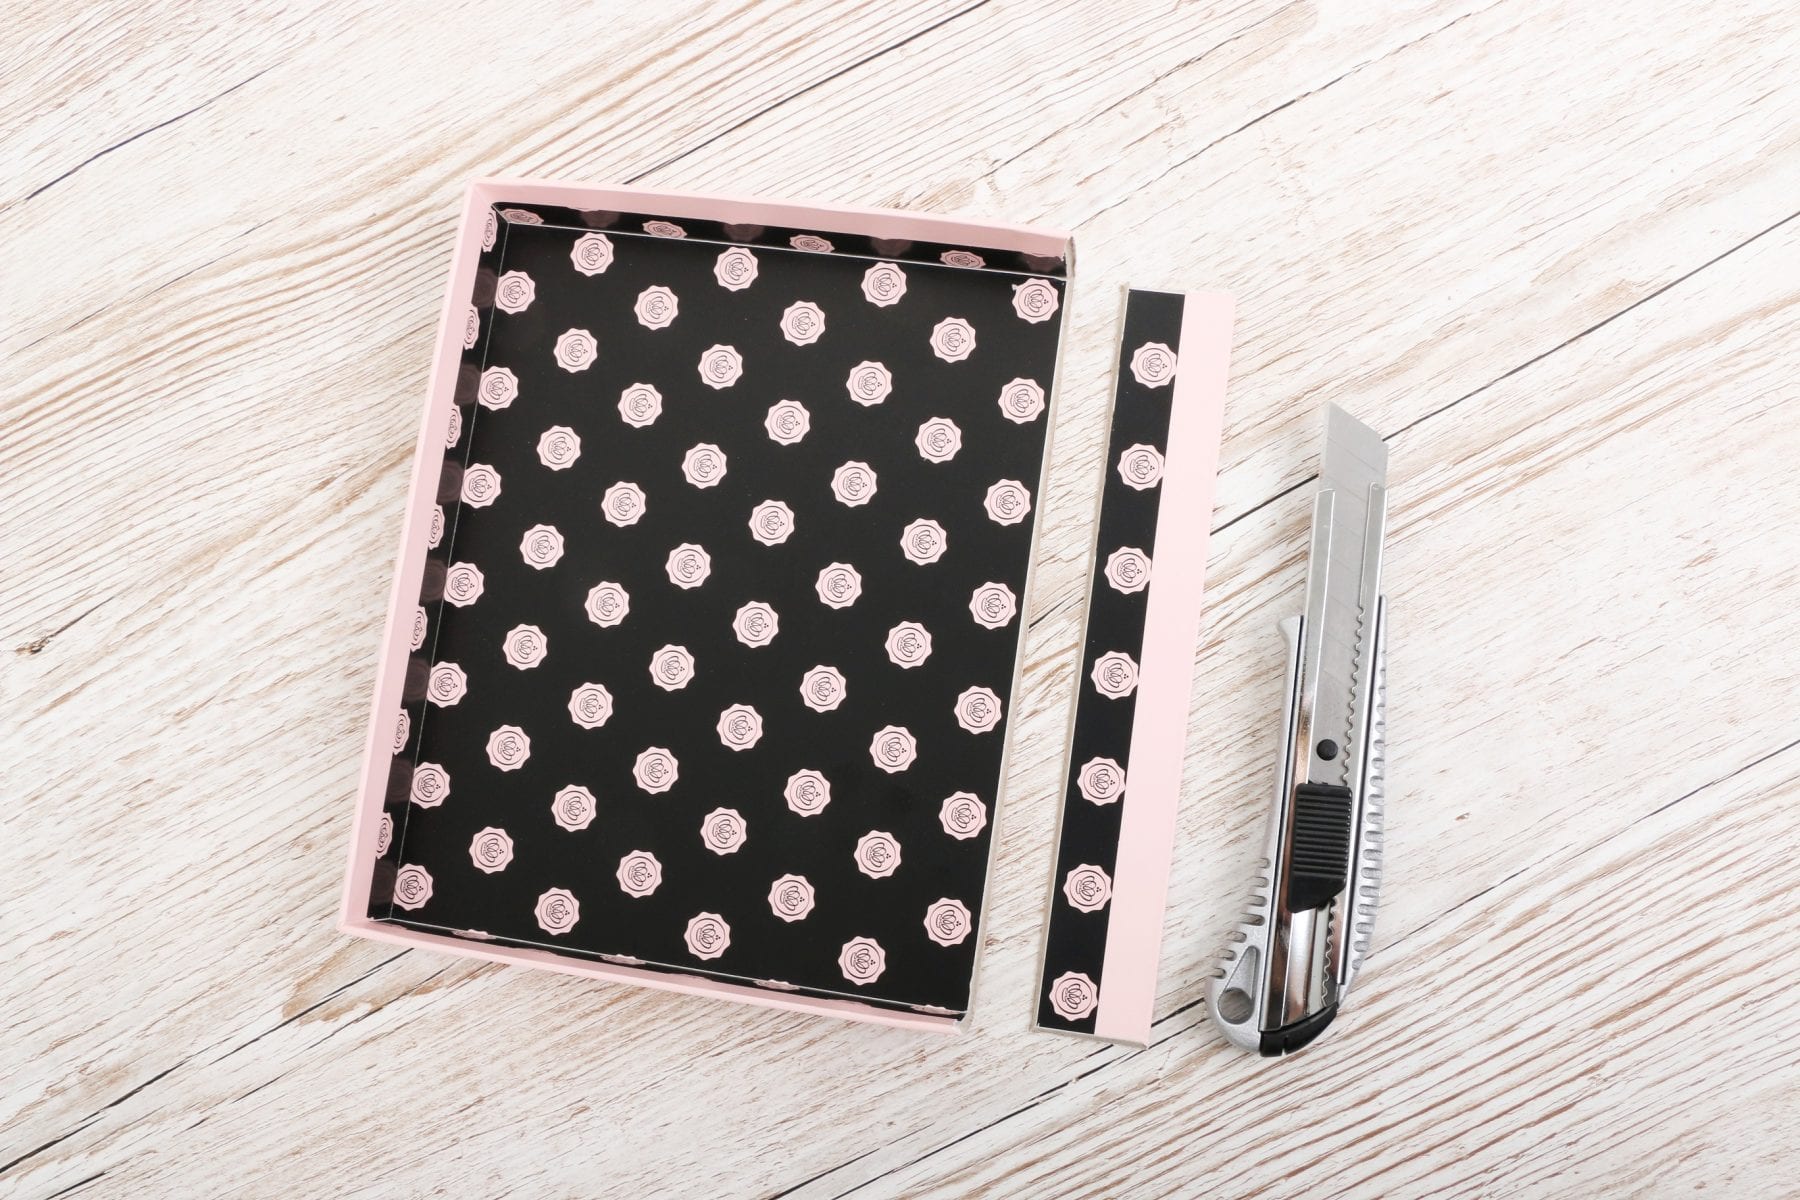
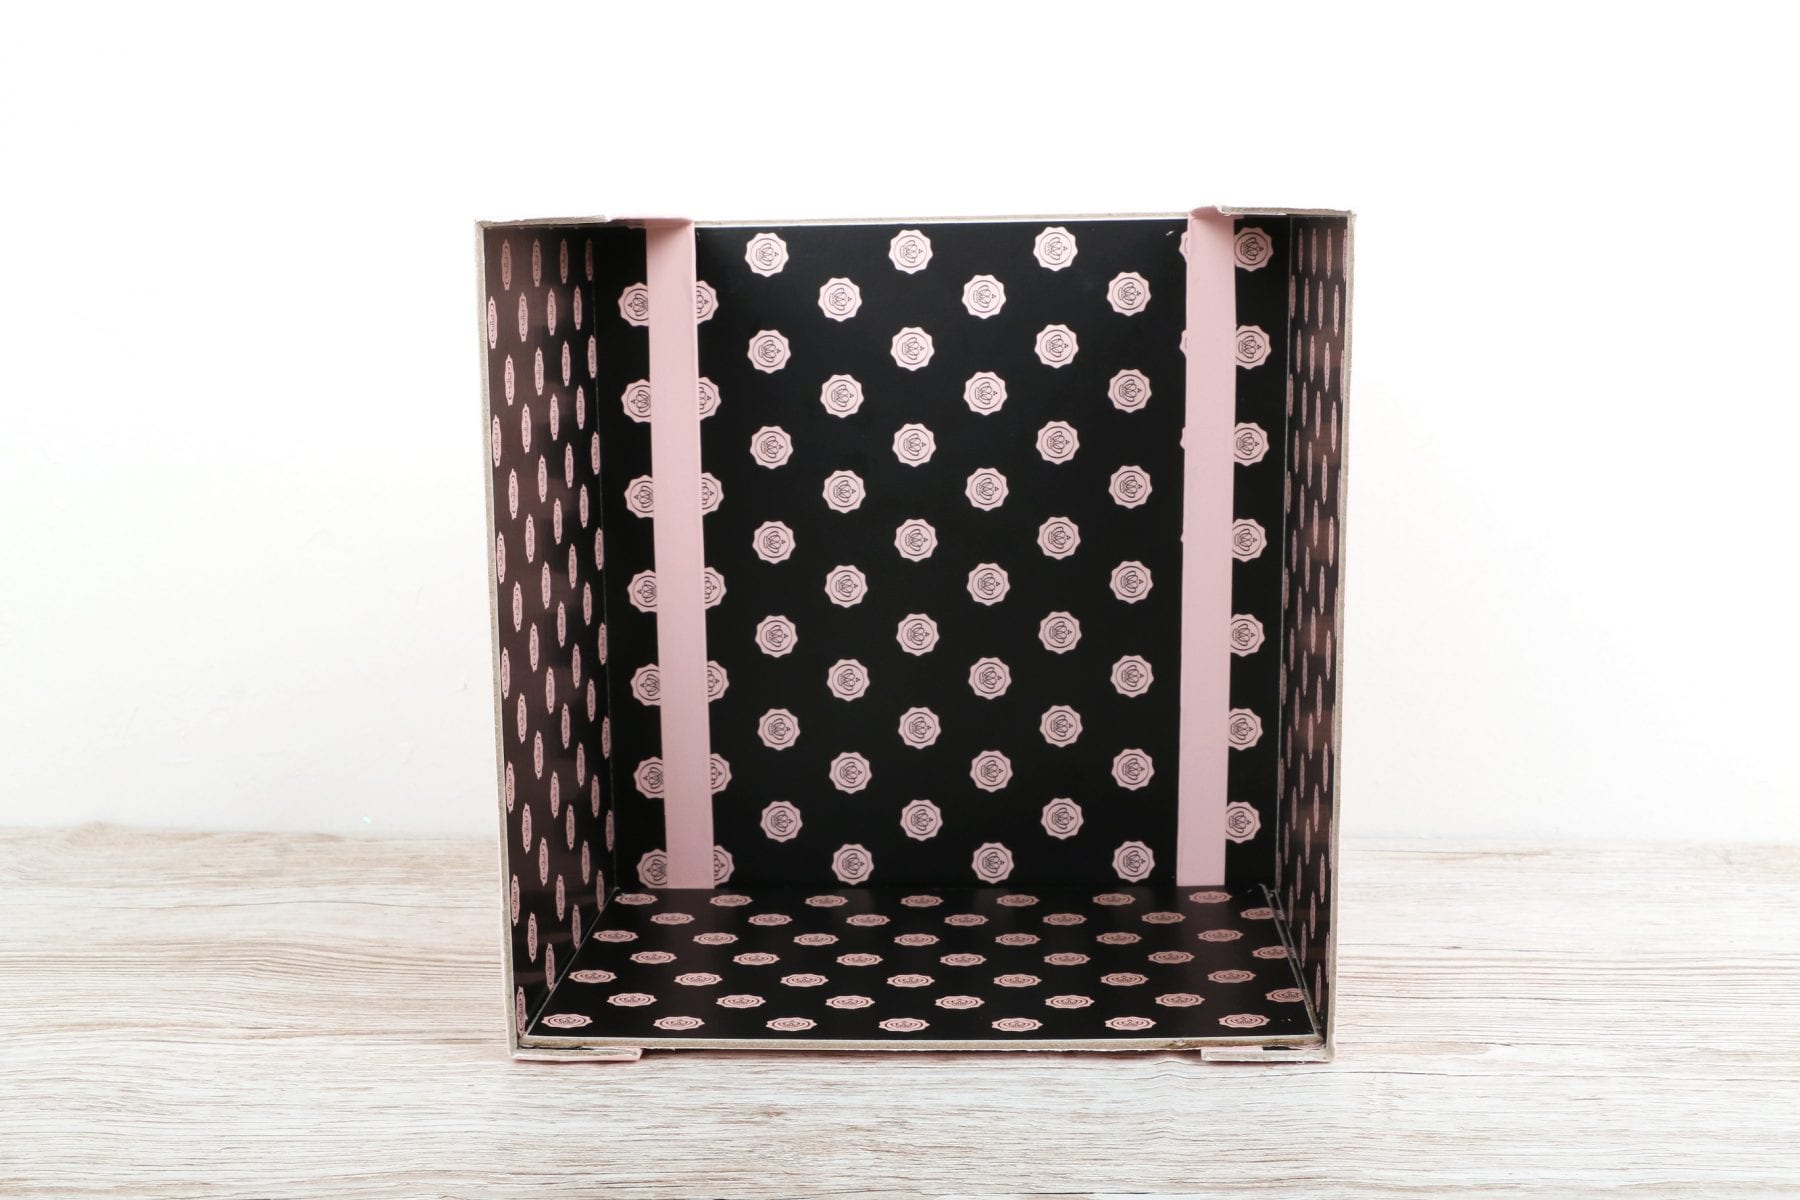
Step 1: Create The Outside Walls
The first thing we need to do is create the building blocks for the outside casing of your drawer unit. For this, take two lids and cut one of the longest sides off of each, as below.
Step 2: Create The Back Panels
Next, take two bases and cut all of the edges off so that you’re left with two rectangle pieces of card. You can discard the four edges of each box.
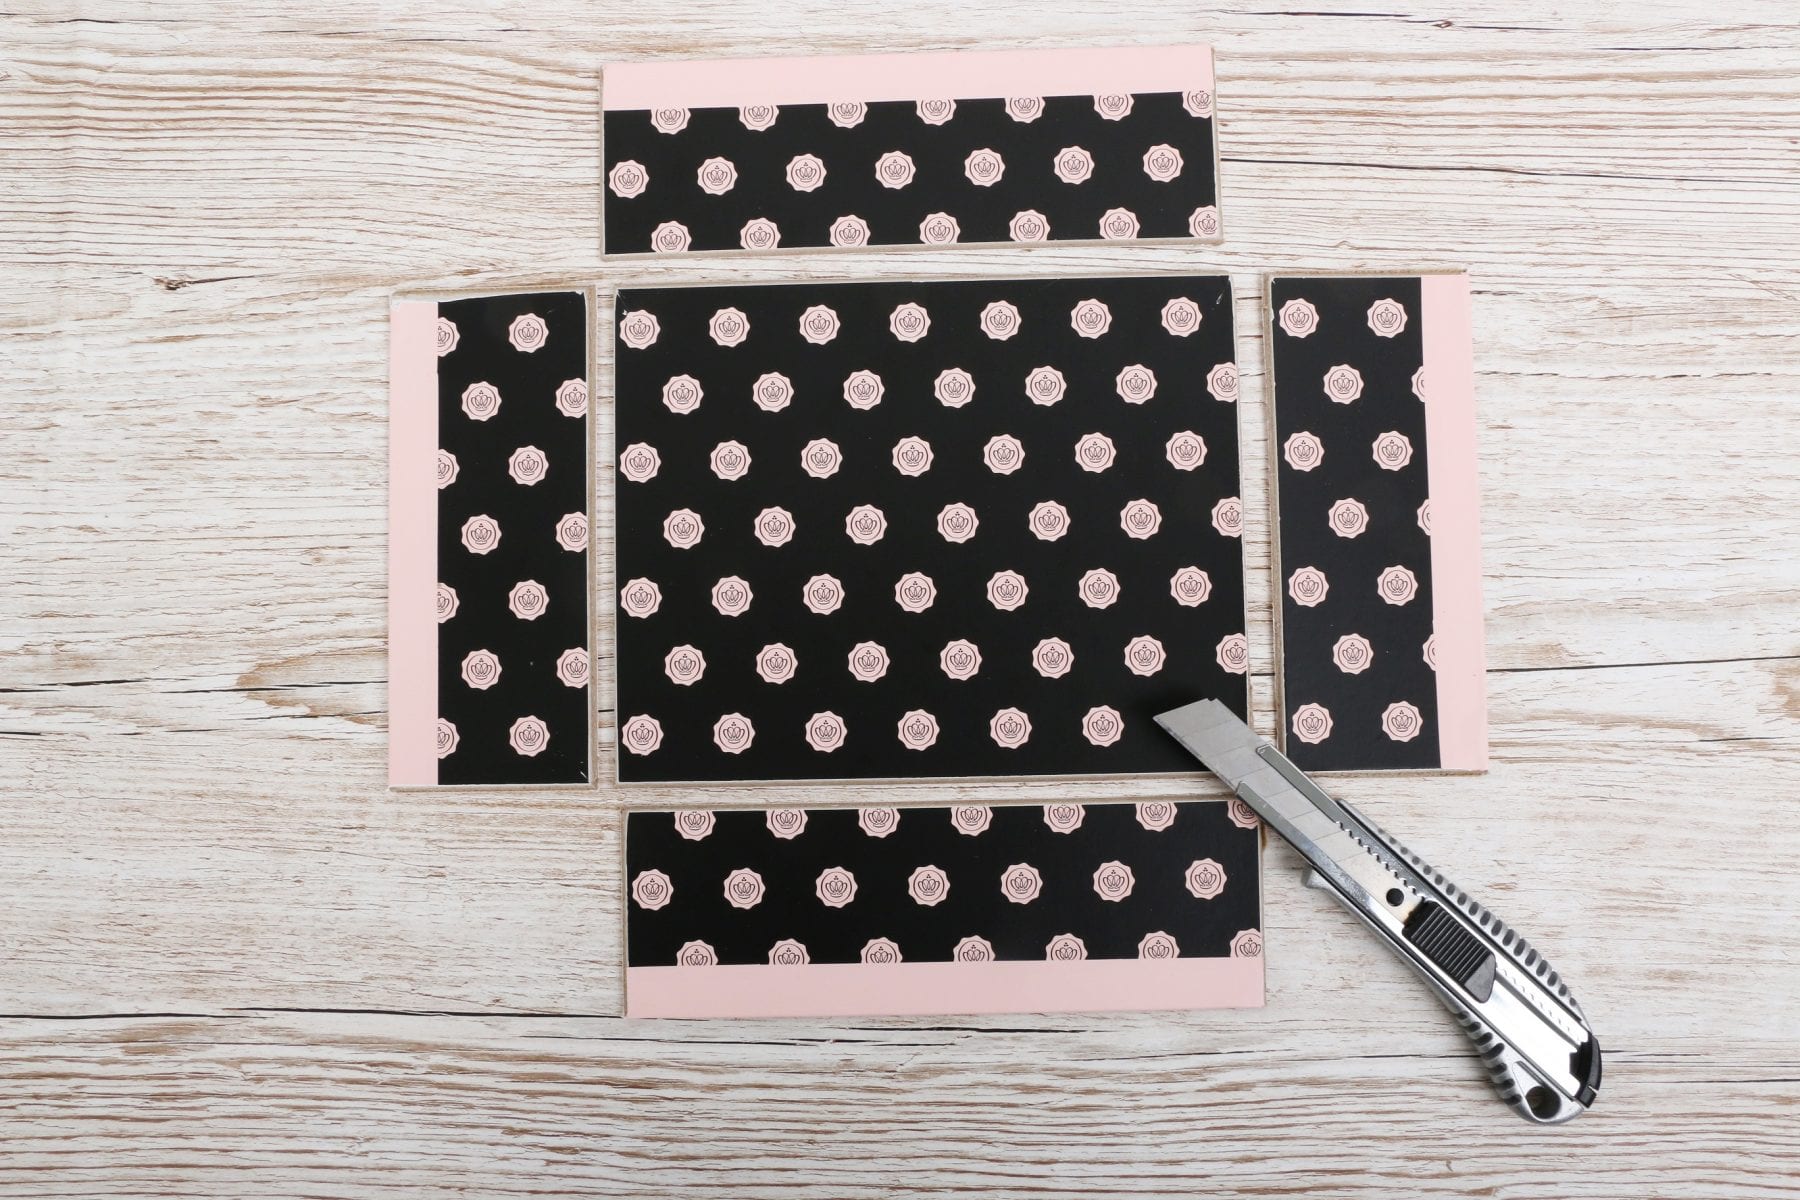
Step 3: Prepare For Assembly
Lay down the two rectangles you’ve just cut out, with the GLOSSYBOX logos facing upwards. Then, place the two lids either side of the top rectangle with their exposed edges facing forward.
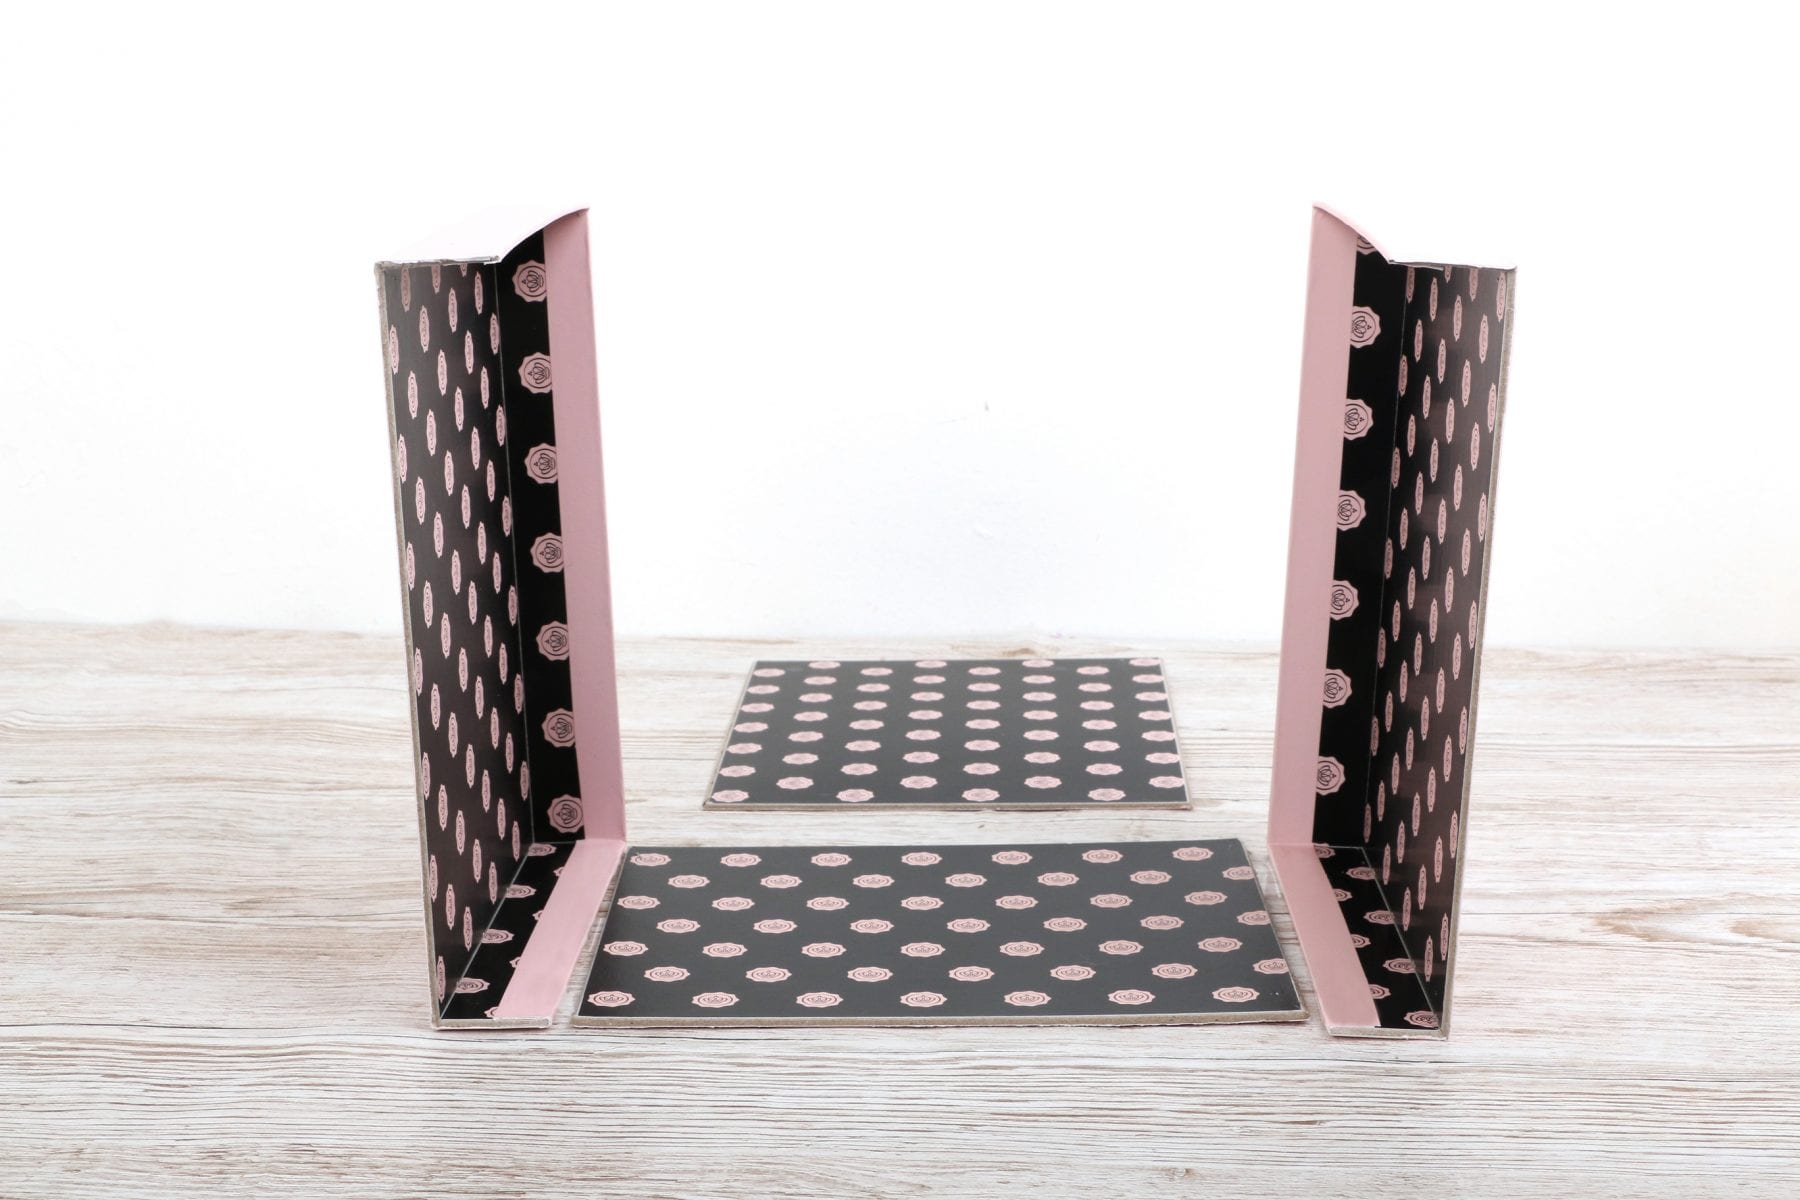
Step 4: Glue It Together
You can now glue the different panels together. Slide the two lids under the first rectangle and glue it in place. Then, glue the second rectangle to the back of this unit.
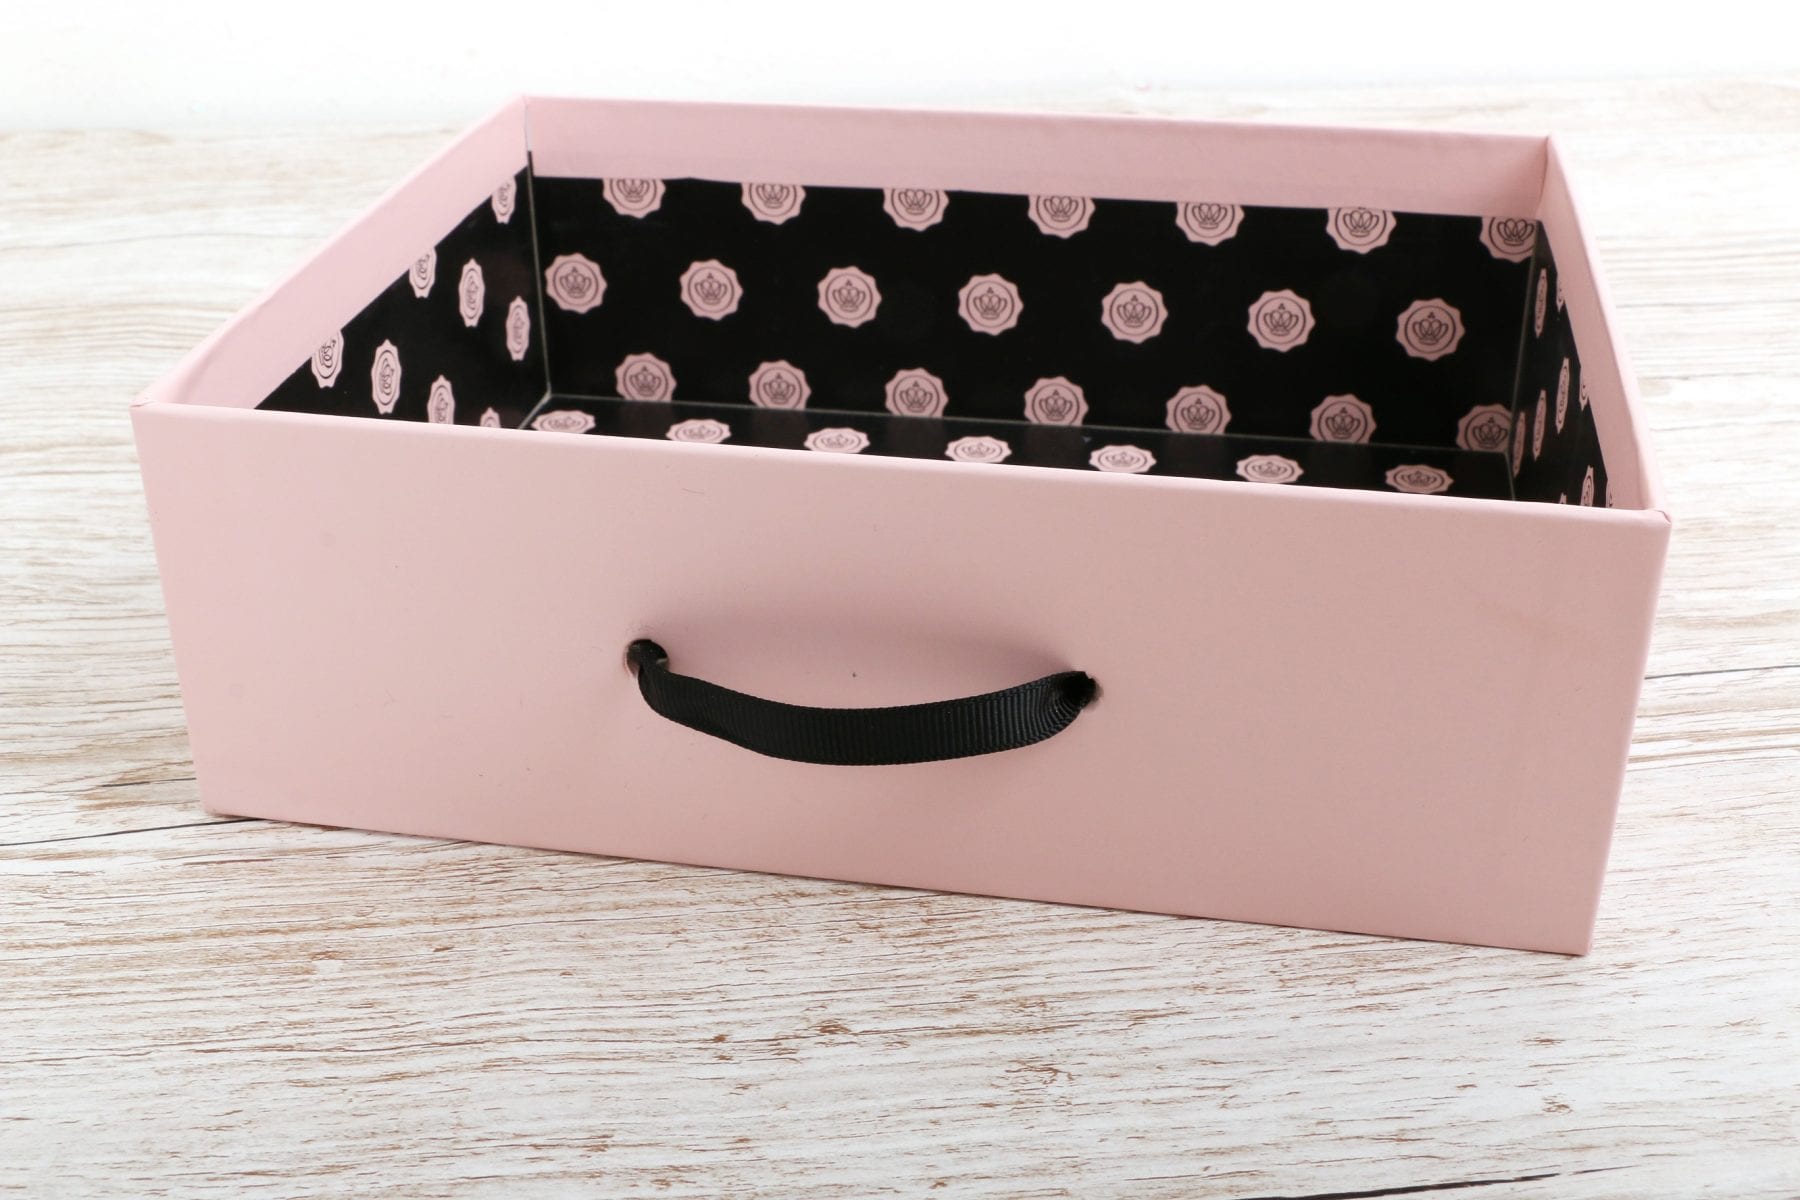
Step 5: Create Your Draws
This is where the other three boxes come in. Take your untouched box bases and pierce two holes in the front pacing edge of each of them. This is where the draw handles will be.
Next, cut a strip of your GLOSSYBOX ribbon and tie it through the two holes on each base, securing with a knot on either side. Make sure you leave the ribbon slack so you can pull the handle!
Step 6: Add The Draws Into The Base
Place these three boxes with ribbon handles into the structure you created in step 4 so they fit in as drawers.
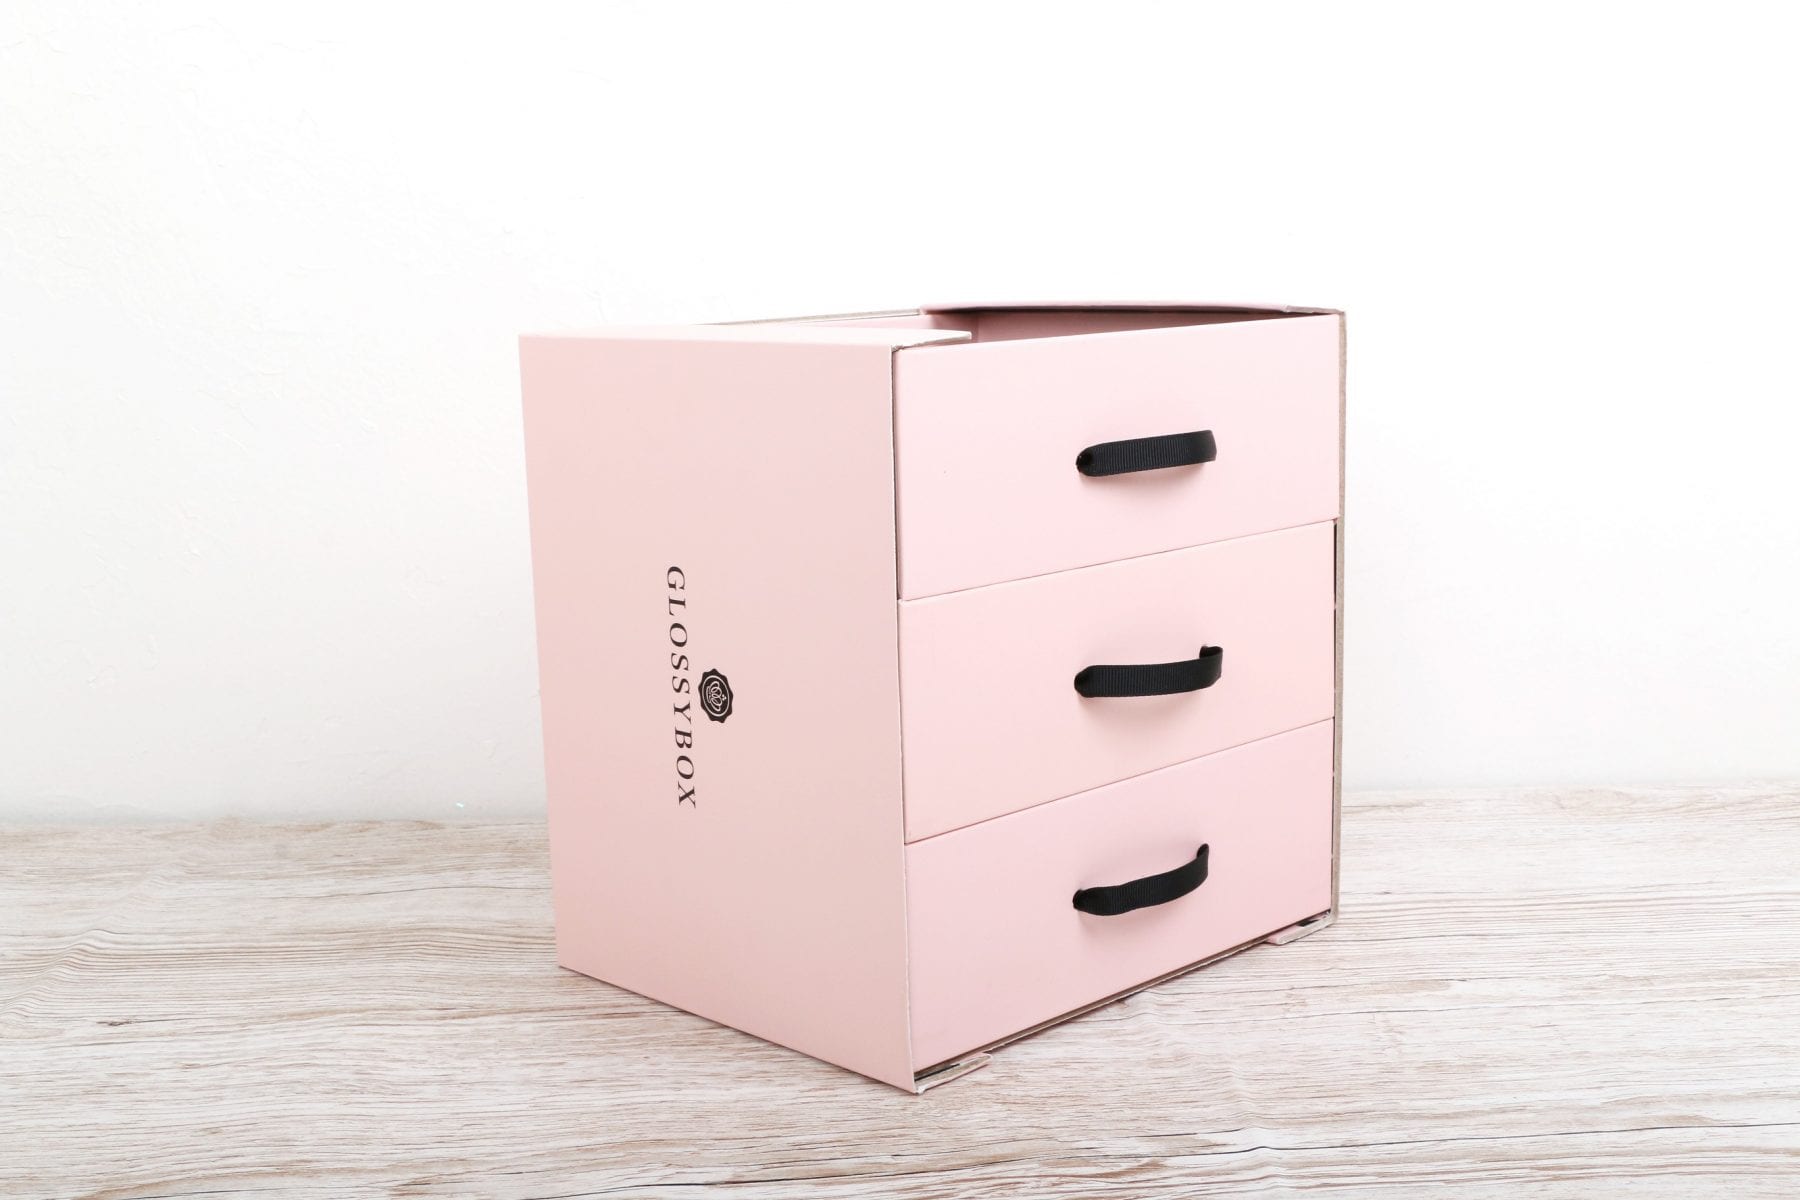
Step 7: Create A Lid
Take an untouched lid, hold it so that you’re looking at the black underside with pink GLOSSYBOX logos, then pierce two holes into the two top corners.
Then, tape one of the long edges to the back of the top unit so that the pink side with the single GLOSSYBOX logo is facing upwards and the two holes you have created are towards the front of the unit.
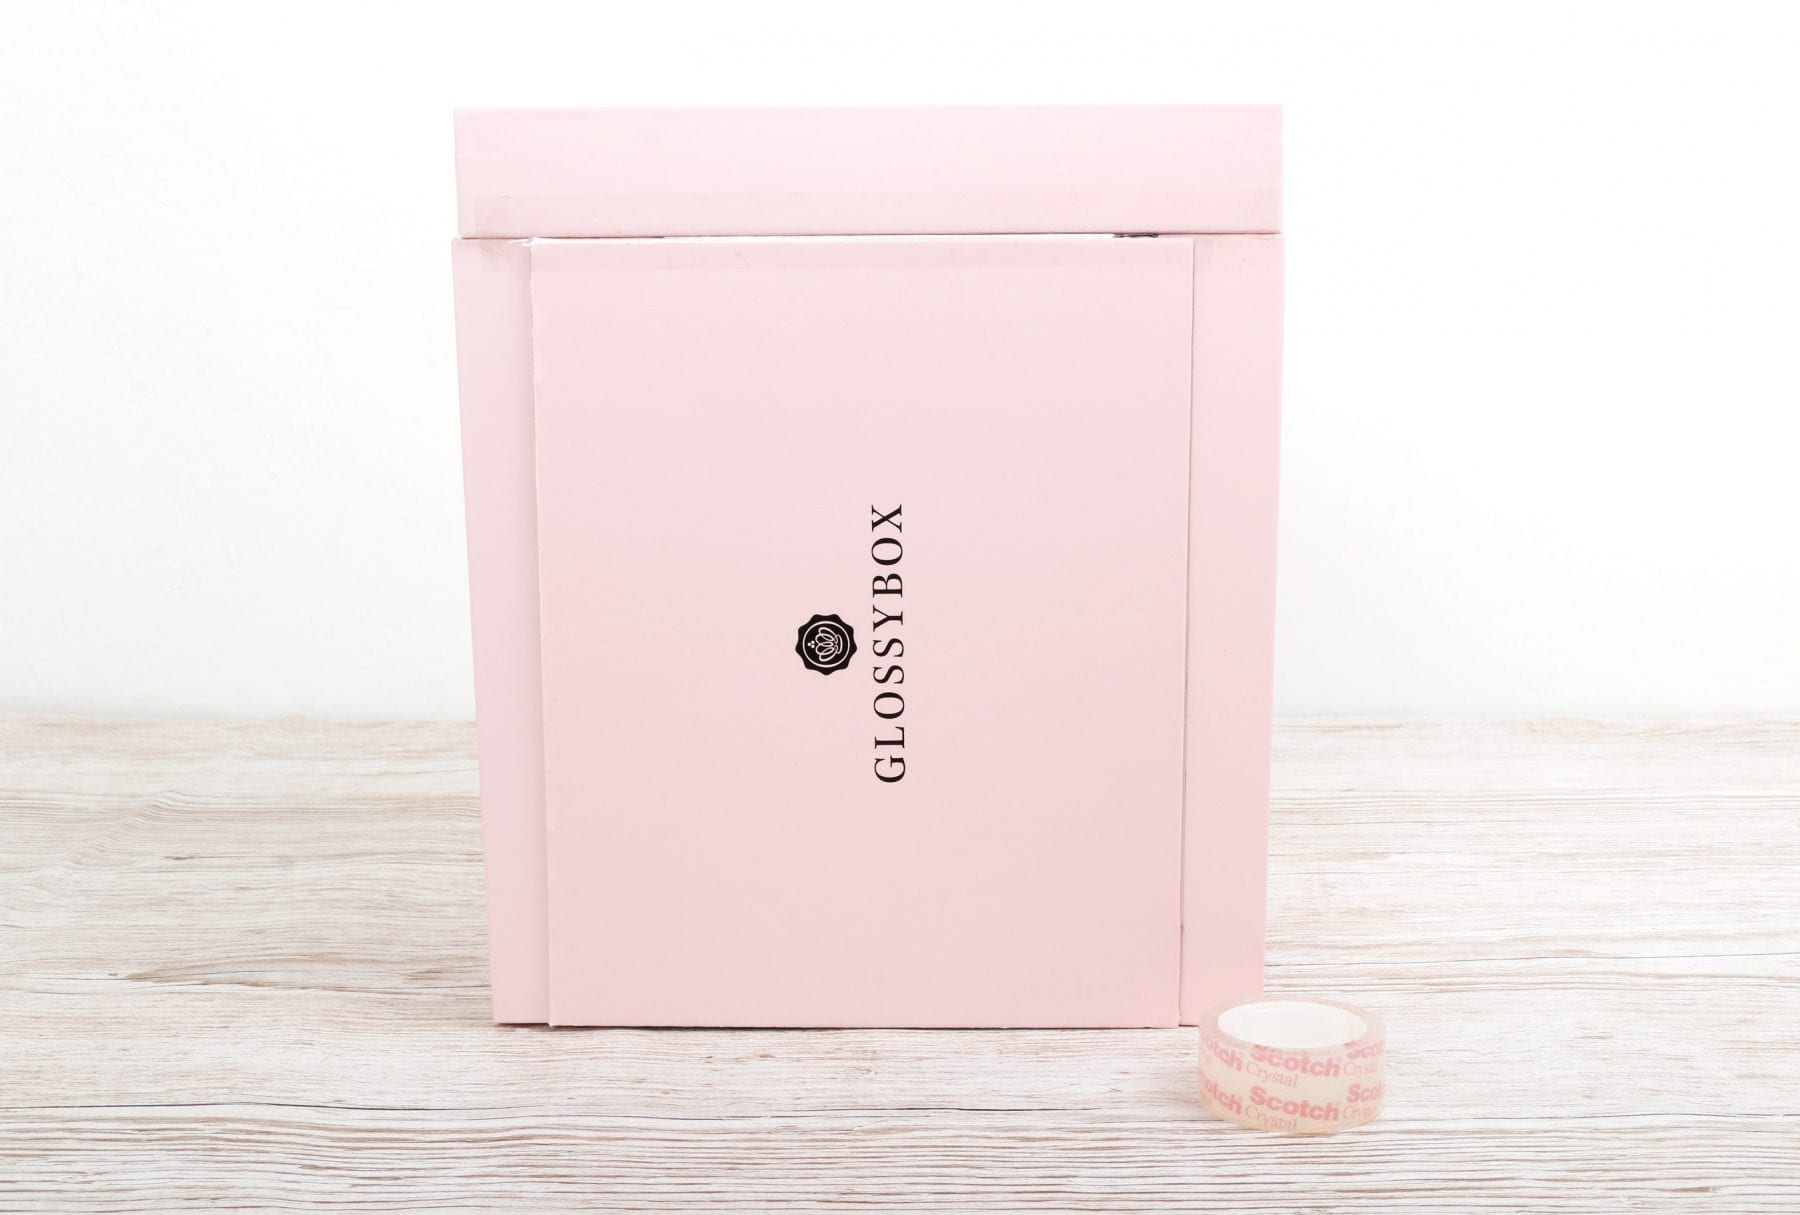
Step 8: Keep The Lid In Place
To keep the lid in place and help it to move up and down, cut two pieces of your GLOSSYBOX ribbon. Thread it through the two holes in your lid and secure with knots. Then, secure it under the flaps of the base, as shown below.
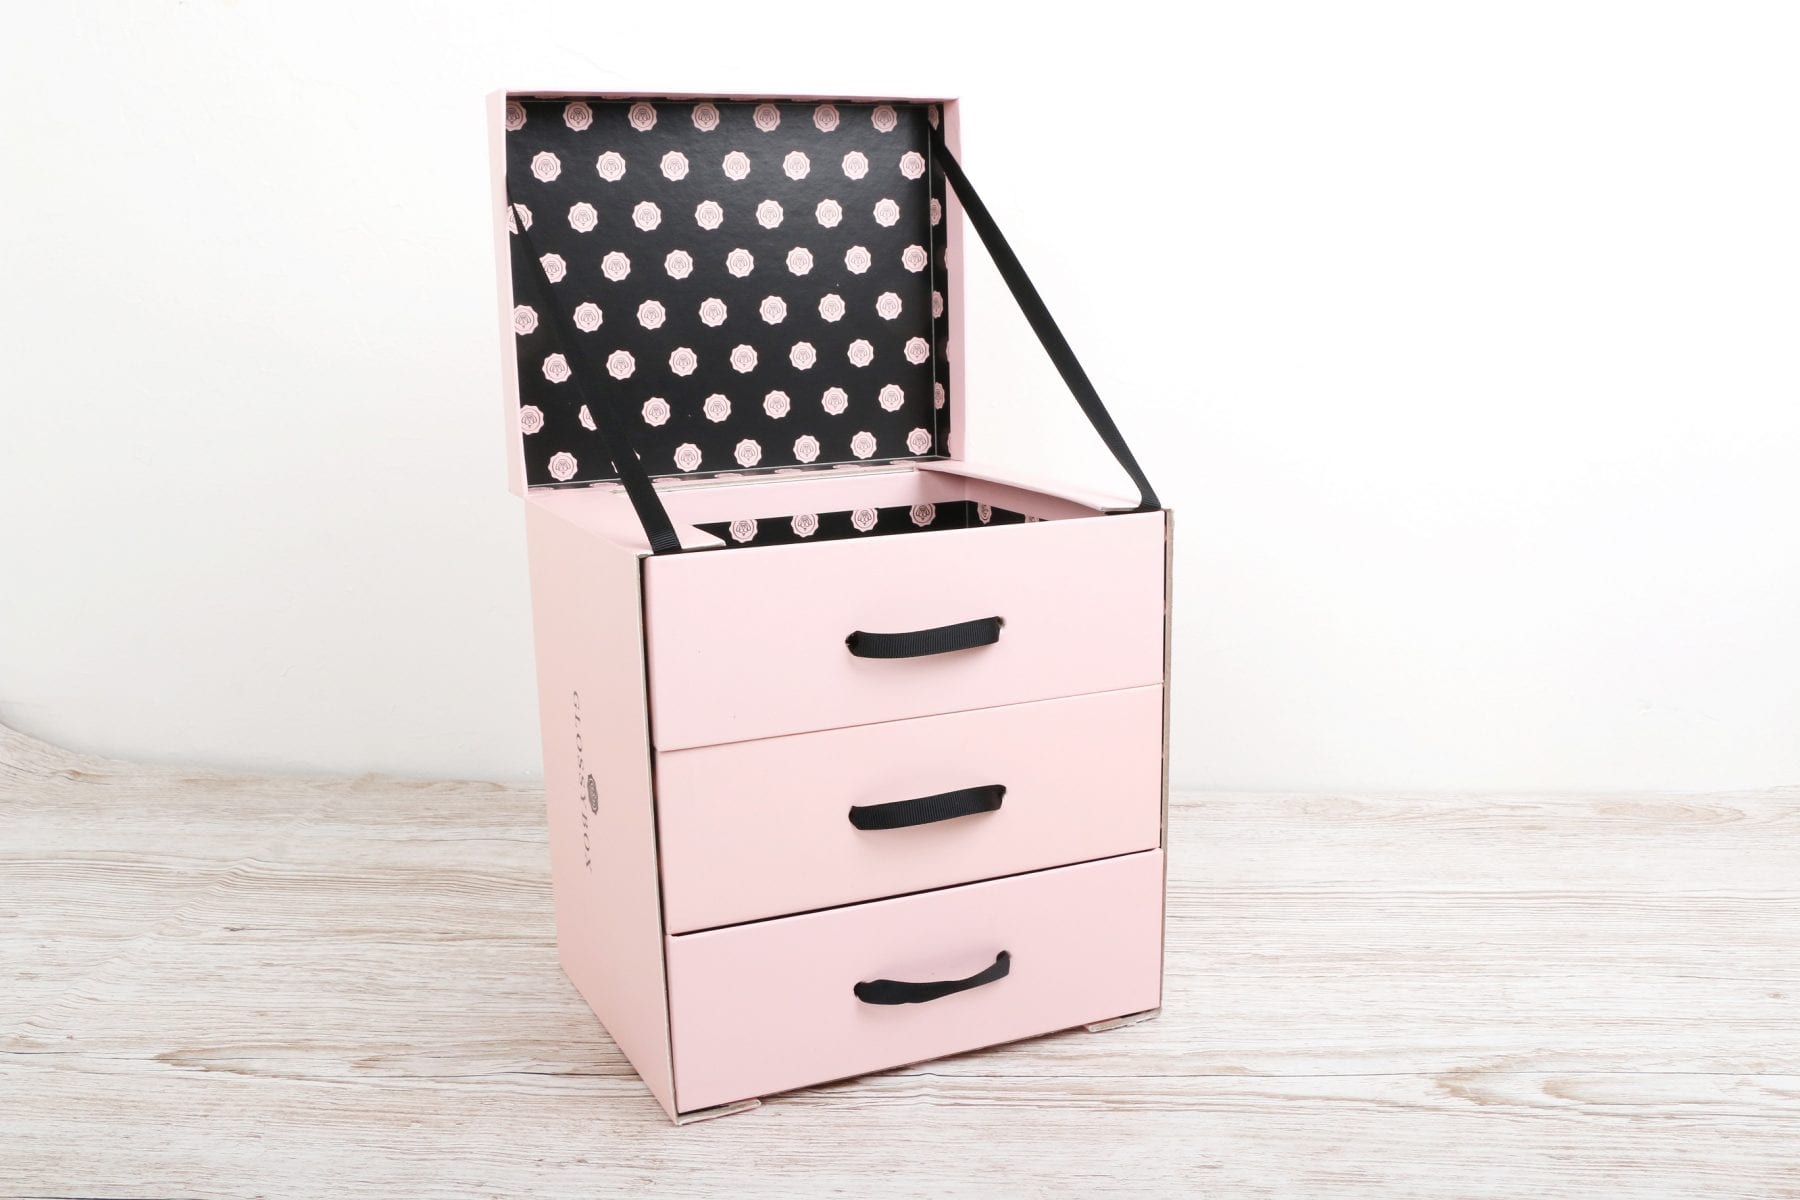
And there you have it! A beautiful drawer unit for your favourite cosmetics.
Subscribe To GLOSSYBOX
Of course, if you love all thing beauty, you’re going to fall head over heels for our GLOSSYBOX. Filled with 5 must-have makeup, skincare and haircare products, it allows you to discover the trendiest beauty essentials out there. Plus, we’ll deliver a box straight to your door every month. What are you waiting for? Subscribe now!


